Rhubarb Curd
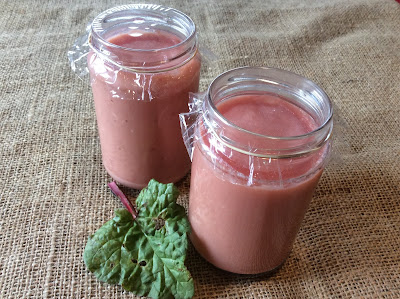
The chickens are laying like crazy at the moment - they love this glorious spring weather - so I have lots of spare eggs. Deciding to experiment with different versions of lemon curd was therefore an easy one! This is a rhubarb curd, made with the lovely scarlet spring rhubarb. There are many ways of making this curd, but I found that cooking the rhubarb first, then pureeing the result and then making the curd worked best for colour. I tested sieving it (the front one) and not sieving it (the back one). Not sieving means little pieces of errant egg white and the odd stringy bit of rhubarb. Sieving means a beautifully smooth curd, but less of it. You takes your choice!
The curd is delicious on toast, in yoghurt or whipped cream, or simply spooned from the jar... It is naturally gluten free, though I suspect would be difficult to set if it were dairy free as well.
Rhubarb Curd
The curd is delicious on toast, in yoghurt or whipped cream, or simply spooned from the jar... It is naturally gluten free, though I suspect would be difficult to set if it were dairy free as well.
 |
| Rhubarb Curd |
Rhubarb Curd
7oz/200g
white sugar (3oz/75g of this goes in with the rhubarb)
1lb/400g
(approx.) red forced rhubarb, cut into small chunks
2
fl oz/60ml water
2
eggs + 1 yolk, beaten
2
tbsp lemon juice
4oz/110g
butter
The
best way to make this is in a double saucepan (one with a separate chamber
below for the boiling water), but a heatproof bowl (Pyrex) on a pan of
simmering water works just as well, if a little more slowly.
First
put the rhubarb, water and 3oz/75g of sugar in a standard pan and simmer gently
until the rhubarb has softened completely.
Puree this with a blender so that you lose all the stringy bits and the
texture of the rhubarb becomes smooth.
Now
put everything into the bowl/double pan, and stir until the sugar has
dissolved. Carry on heating it, stirring from time to time, until
the mixture has thickened – it coats the back of the spoon, and then becomes
more difficult to stir. This will take about 10-15 minutes.
If
you want to, strain the mixture through a sieve into small sterilised jars –
you will only make about 2-3, less still if sieved. Cover the jars
as per jam – with waxed discs and cellophane tops. Alternatively, as you
will be using this up quickly because it is so delicious, cut circles of parchment to fit the jars, and
then put the lids back on firmly.


Comments
Post a Comment